

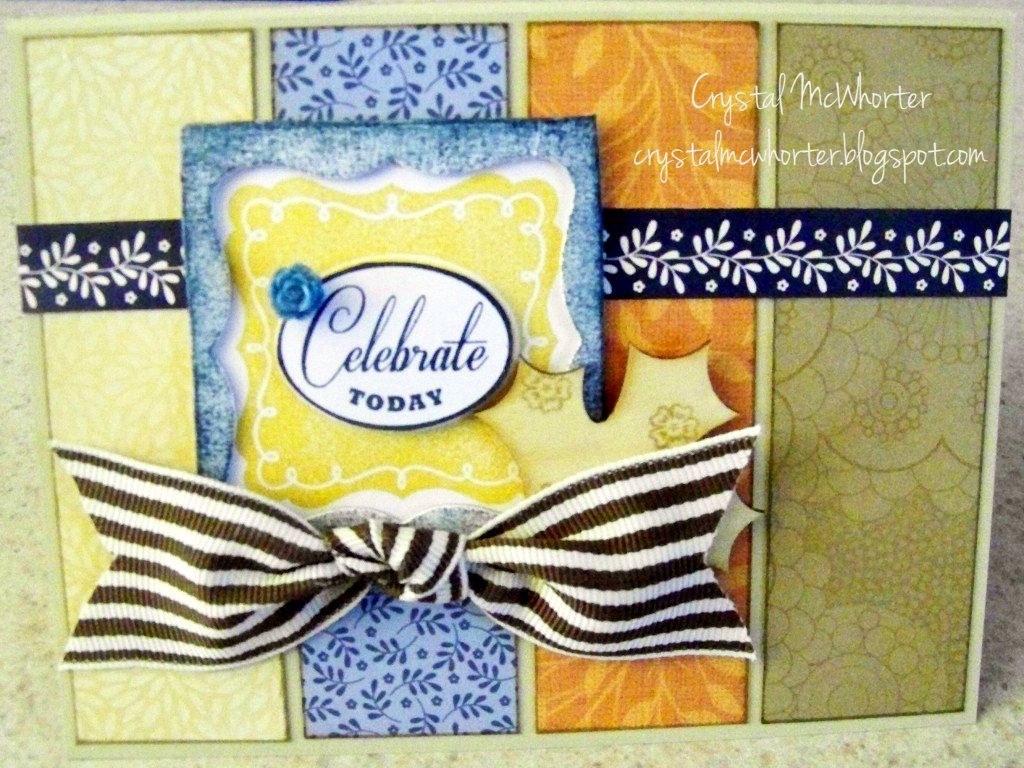
This fall inspired card was created using scraps from my stash & the card pattern out of the Make It From Your Heart how-to book on the top of page 42! I save so many scraps from my paper packs that I really really need to get them used! So to show everyone how you can maximize the product to the fullest I created this card!
2. I then cut the 4 strips of the different patterns at 4"x 1 1/4" and inked the edges ever so slightly with Desert Sand ink.
3. I then cut a zip strip at 5 1/2" from the top of one of the Pemberley sheets to adhere across the strips of patterned paper.
4. The stamp is paper pieced by stamping it on white cardstock in Honey and then also in Outdoor Denim. You then cut the "Celebrate Today" oval from the Outdoor Denim image and pop it with 3-D Foam over the Honey colored image! Waaalaa! LOL!
5. Now I had used all of my Mixed Shapes Chipboard shapes but had kept the sheet still with the outlines of the shapes!! (You can also cut up the outlines and use them to "pop" your items off your work!) So all I did was cut a square around the outline of the shape that sorta matches the image I stamped. Then I used the Stipple Brush from the Texture Tools to "stipple" Outdoor Denim ink around the chipboard. Then simply adhere it over top of your stamped image to create a recessed look and add dimension.
6. At this time, I used the small flower from the Merry & Bright stamp set to random stamp one of the Maple leaves from the Arbor Wooden Shapes set in Desert Sand ink.
7. Then I adhered the leaf under a bow tied from the Chocolate Grosgrain Ribbon and added one of the itty bitty flowers from the Bouquet Assortment to finish it off :)
Here's the Products I Used:
Stamps:
Casual Expressions D1525 pg 27
Merry & Bright C1515 pg 63
Ink:
Honey Z2162 pg 9
Outdoor Denim Z2140 pg 9
Desert Sand Z2118 pg 9
Tools:
Texture Tools Z1298 pg 134
2x2 Acrylic Block Y1003 pg 121
Paper Cutter Z1783 pg 135
Micro Tip Scissors Z534 pg 135
Cardstock/Paper:
Flirty Paper Pack X7160 pg 50
Other:
Make It From Your Heart How-To Book 9035
Bouquet Assortment Z1694 pg 128
Chocolate Striped Grosgrain Ribbon Z1670 pg 124
Arbor Wooden Shapes Z1765 pg 170
Mixed Shapes Chipboard Shapes Z1683 pg 131
3-D Foam Z1151 pg 135
To order any of these items visit my website: www.crystalmcwhorter.myctmh.com
3-D Foam Z1151 pg 135
To order any of these items visit my website: www.crystalmcwhorter.myctmh.com


1 comments:
I love your use of multiple paper packs. Beautiful!
Post a Comment